Once you have enabled all of the products that you would like to offer on your website, you'll need to add them to a new or existing web product catalog. You may configure multiple product catalogs, but by default the products to be offered on the website will be polled from the default product catalog. The default catalog is denoted with a blue checkmark icon, and it may or may not be named Default. For additional information on assigning catalogs to your Photo Finale website, please see the section on Application Settings in Chapter 3.
Adding a New Catalog and Creating Categories:
Creating a product catalog Creating a product category Catalog Options Category Options
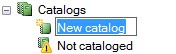
- Start by accessing Store Management > Product Catalog and select Create a New Catalog from the left-hand panel under the Catalog listing.
- Enter a name to identify this catalog, then press Enter.
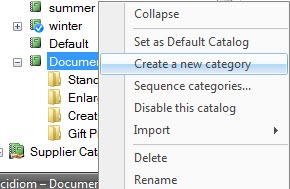
- Right-click on the new catalog, and select to create a new category, then enter a name for the category.
- Continue to add Categories within the Catalog until you've created all of the category options you would like available for product groupings on your website.
**Note: You cannot add products to a catalog without first adding them to a category. To setup a catalog, you will need to first create the catalog, then create a category, and then select to add products within a category.
To add additional categories to the Default catalog:
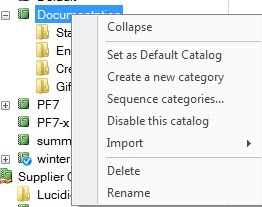
1. Right-click on the default catalog and select "Create Category".
2. Type in a name for the new category, and press Enter.
3. Continue to add Categories within the Catalog until you've created all of the category options you would like available on the website.
Adding Products to the Default Web Catalog
Once all of your desired categories have been added, you'll need to add your web products to the default catalog.
- Click the "+" sign next to the default catalog to expand the listing, if it is not already expanded.
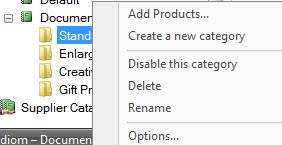
- Right-click on a desired category (for example, "Standard") and choose Add Products.
- A window will open displaying all products available to add to this category. Only products that have been enabled will be available to be added to the category.
- Check the boxes for the desired products and click OK.
Once you have selected the products to add, you can change the price, description, fulfillment options etc. by double-clicking on a product to open it for editing.
When you have finished editing the product, click on Save Changes on the left panel to return to the catalog screen.
Creating Additional Product Catalogs
You can create additional product catalogs to push remote pricing updates to your kiosks or to start setting up for a planned product offering change. This feature is often utilized by labs to change the products/pricing listed on the website for special promotions and then reverted back to the original information by simply changing which catalog is set as the default.