Once you have enabled all of the products that you would like to offer on your website, you'll need to add them to a new or existing web product catalog. You may configure multiple product catalogs, but by default the products to be offered on the website will be polled from the default product catalog. The default catalog is denoted with a blue check mark icon, and it may or may not be named Default. For additional information on assigning catalogs to your Photo Finale website, please see the section on Application Settings in Chapter 3.
Adding a New Catalog and Creating Categories:
Creating a product catalog Creating a product category
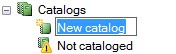
- Start by accessing Store Management > Product Catalog and select Create a New Catalog from the left-hand panel under the Catalog listing.
- Enter a name to identify this catalog, then press Enter.
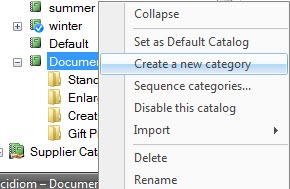
- Right-click on the new catalog, and select to create a new category, then enter a name for the category.
- Continue to add Categories within the Catalog until you've created all of the category options you would like available for product groupings on your website.
**Note: You cannot add products to a catalog without first adding them to a category. To setup a catalog, you will need to first create the catalog, then create a category, and then select to add products within a category.
To add additional categories to the Default catalog:
1. Right-click on the default catalog and select "Create Category".
2. Type in a name for the new category, and press Enter.
3. Continue to add Categories within the Catalog until you've created all of the category options you would like available on the website.
Adding Products to the Default Web Catalog
Once all of your desired categories have been added, you'll need to add your web products to the default catalog.
- Click the "+" sign next to the default catalog to expand the listing, if it is not already expanded.
- Right-click on a desired category (for example, "Standard") and choose Add Products.
- A window will open displaying all products available to add to this category. Only products that have been enabled will be available to be added to the category.
- Check the boxes for the desired products and click OK.
Once you have selected the products to add, you can change the price, description, fulfillment options etc. by double-clicking on a product to open it for editing.
When you have finished editing the product, click on Save Changes on the left panel to return to the catalog screen.
Catalog Options
Creating Additional Product Catalogs
You can create additional product catalogs to push remote pricing updates to your kiosks or to start setting up for a planned product offering change. This feature is often utilized by labs to change the products/pricing listed on the website for special promotions and then reverted back to the original information by simply changing which catalog is set as the default.
Catalog Options:
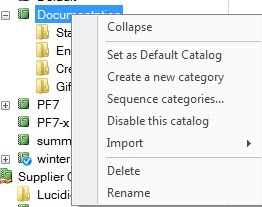
To view options available for customizing the default catalog, right-click on the catalog you wish to edit. The menu options are as follows:
- Collapse: The catalog menu will shrink to a single line entry in the product catalog window.
- Set as Default Catalog: Assigns the selected catalog as the preferred product listing for Photo Finale Web.
- Create a new category: Creates a new product group with the name you specify.
- Sequence categories: Opens a window to organize the categories available within the catalog. By default, categories are listed in the order in which they are added to the catalog.
- Disable this catalog: Deselects the catalog as the default.
- Import: Allows you to import a pre-defined product list from a third-party supplier or Lucidiom. Options within this section include the following:
- From Template: Imports a catalog of standard print products or prints and folio products created by Lucidiom. It includes the icons that are assigned to each product group on the APM and default recommended retail pricing.
- From Supplier: Imports a catalog of products from a third-party provider. These products may be produced in-house or re-routed to a production house depending on the catalog settings specified by the provider.
- Delete: Removes the catalog from the product catalog. This cannot be reversed.
- Rename: Renames the catalog.
Category Options Disabled Category Tree Disabled Sub-category
Category Options:
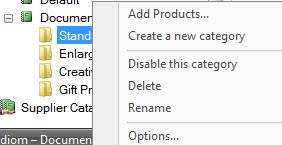
To view options available for customizing a category within a catalog, right-click on the category you wish to edit. The menu options are as follows:
- Add Products: Add products to be offered within the category.
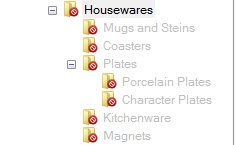
- Create a new category: Create a new category within the category. This option is new with version 7.5 and is to mirror the product groupings available on the kiosk. Example: Housewares gift products divide into Mugs and Steins, Coasters, Plates, Kitchenware, and Magnets. These categories also divide into further groups such as Porcelain Plates and Character Plates.
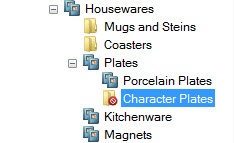
- Enabled/Disable this category: Enables or disables the category on Photo Finale web. You can disable entire categories or sub-categories within a category.
- Delete: Removes the category or sub-category.
- Rename: Renames the category or sub-category within the catalog.
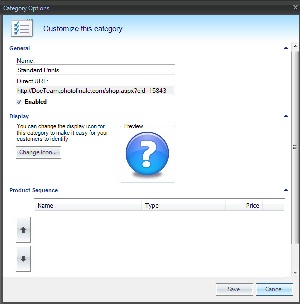
- Options: Opens a window to organize the products listed within the category. This window also provides a direct URL link to the category for use in linking Start Page ads, and it provides a means of adding/changing icons for individual sub-categories.
To change the icons associated with a category:
- Right-click on the category for which you would like to add/change an icon.
- Select the Options menu. The current icon, if one has been assigned, will appear in the preview window.
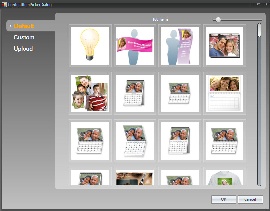
- Click on the Change Icon button, and the Category Icon Selection screen will open. The options on the left panel do the following:
- Default: Displays Lucidiom default icon set. These icons match the icons used in the APM software.
- Custom: Displays any icons that have been uploaded to your account.
- Upload: Allows you to add a new icon to your custom library.
4. Once you have selected an icon, press the OK button.
**Note: If you hover over an icon, the full file name will be displayed.
Category Options Window Category Icon Selection
Improper Catalog and Category Setup
When setting up a main Category or Sub-category, make sure to have at least one active/enabled product within that section before enabling the Category or Sub-category itself.
Also, make sure that if a Sub-category is enabled that the Parent Category is also enabled. Failing to do so may cause issues on the site with order completion when a customer attempts to finalize an order.