To use the ColorFlow processing features in Lab 50, you'll first need to enable it within the Photo Processing screen.
Photo Processing > ColorFlow
- At the top of the Menu bar, select Settings.
- On the left panel select Photo Processing > ColorFlow.
- Check the box Enable ColorFlow processing.
Configuring a new Workflow for editing Photos
Once you have enabled the ColorFlow processing option, you can begin setup of a new Workflow by clicking on the Add button at the bottom of the right panel.
The steps to configure a new Workflow include the following:
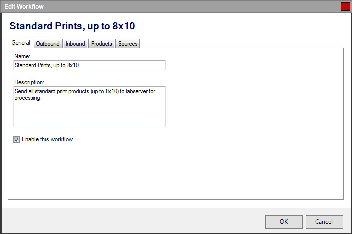
- On the General tab, enter a name for the Workflow and check the box "Enable this workflow".
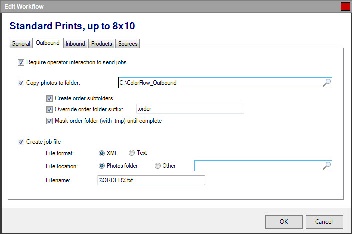
- For the Outbound tab, select how you would like the software to handle orders being sent through this Workflow. Options within this tab include exporting to a new folder, creating order subfolders, and requiring lab operator interaction to start the ColorFlow processing in lieu of automatically exporting.
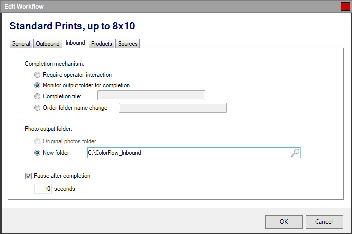
- Under the Inbound tab, select how you would like Lab 50 to find the newly edited photos. Options on this tab include monitoring for photos in a new folder, checking for a folder name change, finding a completion file, or lab operator interaction indicating the editing is complete.
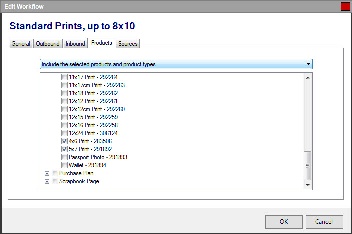
- Using the Products tab, you will select which products to include or exclude from this Workflow. If you would like to process products differently according to product type, you will need to configure multiple Workflows.
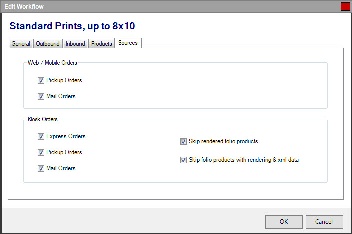
- Lastly, the Sources tab is used to specify which order types should use the Workflow for processing. You can also elect to ignore products that have been rendered at the kiosk should you decide to not offer this premium editing service for in-store orders.
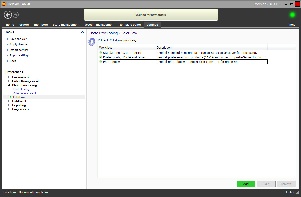
General tab Outbound tab Inbound tab Products tab Sources tab Orders Queued for ColorFlow Processing Lab 50 Monitoring for Photo Editing Completion Order Editing Completed and Next Order Queued
Adding/Editing a ColorFlow Workflow
Configuring Output Settings and Locations for Photos
Configuring Lab 50 Monitoring for Completed Photos
Specifying Products assigned to a Workflow
Configuring Order Types within a Workflow
- General tab Settings:
- Name: A name for your new Workflow. This field is required. Lucidiom Support recommends a brief description of products included and/or sizing information. Example: Standard prints, up to 8x10
- Description: A description of the Workflow. This may be used internally to add additional identifying information such as where the photos will be stored or what type of processing will be done.
- Enable this Workflow: The check box enables the use of the Workflow for the selected settings. To disable a Workflow, un-check the box.
- Outbound tab Settings:
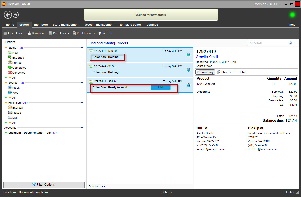
- Require operator interaction: If this option is checked, orders will not be sent through for ColorFlow processing until a lab operator manually clicks the send button. Please see the screenshot to the right captioned "Orders Queued for ColorFlow Processing" as an example of the on-screen notification.
- Copy photos to folder: If this option is checked, you'll need to enter the folder path to use for saving a copy of the order photos. You may use a local folder, mapped network drive, or network path as long as the user account has read/write access to the necessary folder. If the location for storage is on a networked computer, Lucidiom Support recommends using the UNC path to access the location to minimize connection issues. Example: \\labserver\StandardPrints\
- Create order subfolders: To create individual order folders within your destination folder, check this box.
- Override order folder suffix: To change the order folder suffix, check this box and enter the preferred suffix.
- Mask order folder (with .tmp) until complete: Enabling this option will temporarily rename the order folder to xxxxxxx.order.tmp, where xxxxxxx is the order number, until all processing through ColorFlow is complete.
- Create job file: To send a file containing the order number and a list of all photos included in the order, check this box.
- File format: The job file may be formatted as XML or plain Text. Select the radio button that corresponds with your preferred formatting.
- File location: The job file may be output to the standard Photos folder within your Lab 50 configuration, or to another folder by selecting Other and entering a location. Lucidiom Support recommends that if you are including a job file that it is output to the same location as your photos folder specified under the "Copy photos to folder" location.
- Filename: The name to use for the job file. Macros that may be entered and substituted at runtime include %ORDER% to use the order number or %TIMESTAMP% to include the date and time.
- Inbound tab Settings:
- Completion Mechanism:
- Require operator interaction:
- Monitor output folder for completion:
- Completion file :
- Order folder name change:
- Photo output folder:
- Original photos folder:
- New folder:
- Pause after completion:
- Seconds:
- Completion Mechanism:
- Products tab Settings:
Use the drop-down menu to select one of the following options:- Include all products and product types: All products will be edited through ColorFlow using this Workflow configuration.
- Include the selected products and product types: Products that are checked in the box below the drop-down menu will be processed using this Workflow configuration.
- Exclude the selected products and product types: All products except the products checked in the box below the drop-down menu will be processed using this Workflow configuration.
- Sources tab Settings:
- Web / Mobile Orders:
- Pickup Orders:
- Mail Orders:
- Kiosk Orders:
- Express Orders:
- Pickup Orders:
- Mail Orders:
- Skip rendered folio products:
- Skip folio products with rendering & xml data:
- Web / Mobile Orders:
ColorFlow Indicators on the Orders Screen
There are six order status values that may be displayed on the Orders screen while processing orders through ColorFlow. All ColorFlow status updates are prefaced with Color flow: and appear directly under the order number for any given order.
The order status indicators include the following:
- Holding: The holding status appears when ColorFlow has been configured to only process one order at a time. Options that will require single-order processing include the following:
- The option to "Copy photos to folder" is disabled under the Outbound tab.
- The option to "Create Order Subfolder" is disabled under the Outbound tab, and the option to "Copy Photos to Folder" does not include an %ORDER% macro.
- The "New Folder" option is enabled under Inbound tab > "Photo Output Folder", but the "New Folder" path does not include an %ORDER% macro.
- Ready to Send: This status is displayed if the "Require operator interaction to send" option is enabled. To start the ColorFlow Workflow, the lab operator will need to manually click the SEND button.
- Preparing: This notification is displayed while Lab 50 is copying photos and any necessary order files to the editing folder for processing.
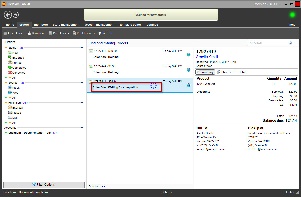
- Waiting for Completion: This option is displayed on-screen while Lab 50 monitors for processing completion. If the Workflow is configured to "Require operator interaction to complete", a DONE button will be displayed until the operator clicks on it manually. If the WorkFlow is configured to monitor the inbound folder, folder name, or for a file complete indicator, a spinning icon will be displayed until the required completion status is reached through file count, folder renaming, or file creation.
- Processing Output: This notification is displayed while Lab 50 is copying edited files back into the database for rendering the final product(s).
- Complete: ColorFlow processing is complete, and the order will be sent to print after a slight pause to allow for the software cache to update.