...
- At the top of the Menu bar, select Settings.
- On the left panel select Photo Processing > ColorFlow.
- Check the box Enable ColorFlow processing.Click
Configuring a new Workflow for editing Photos
Once you have enabled the ColorFlow processing option, you can begin setup of a new Workflow by clicking on the Add button at the bottom of the right panel
...
.
The steps to configure a new Workflow include the following:
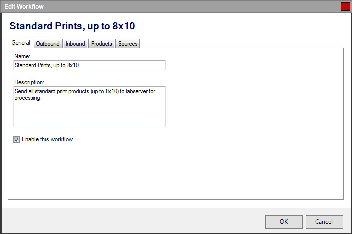
- On the General tab, enter a name for the Workflow and check the box "Enable this workflow".
- For the Outbound tab, select how you would like the software to handle orders being sent through this Workflow. Options within this tab include exporting to a new folder, creating order subfolders, and requiring lab operator interaction to start the ColorFlow processing in lieu of automatically exporting.
- Under the Inbound tab, select how you would like Lab 50 to find the newly edited photos. Options on this tab include monitoring for photos in a new folder, checking for a folder name change, finding a completion file, or lab operator interaction indicating the editing is complete.
- Using the Products tab, you will select which products to include or exclude from this Workflow. If you would like to process products differently according to product type, you will need to configure multiple Workflows.
- Lastly, the Sources tab is used to specify which order types should use the Workflow for processing. You can also elect to ignore products that have been rendered at the kiosk should you decide to not offer this premium editing service for in-store orders.
...
| Advanced Tables - Table Plus | ||||
|---|---|---|---|---|
| ||||
|
...