Image USB, or "Burn to USB" was introduced in APM v10, and allows users to select images at the kiosk to be copied onto a USB drive from Lab 50 or Print 50.
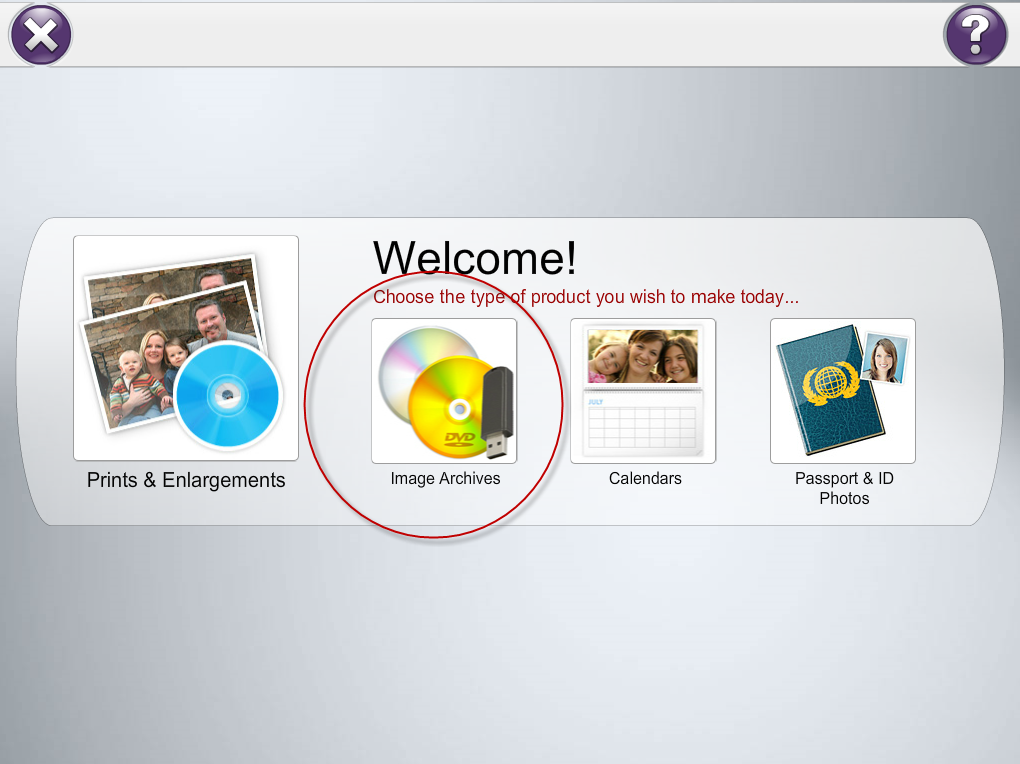
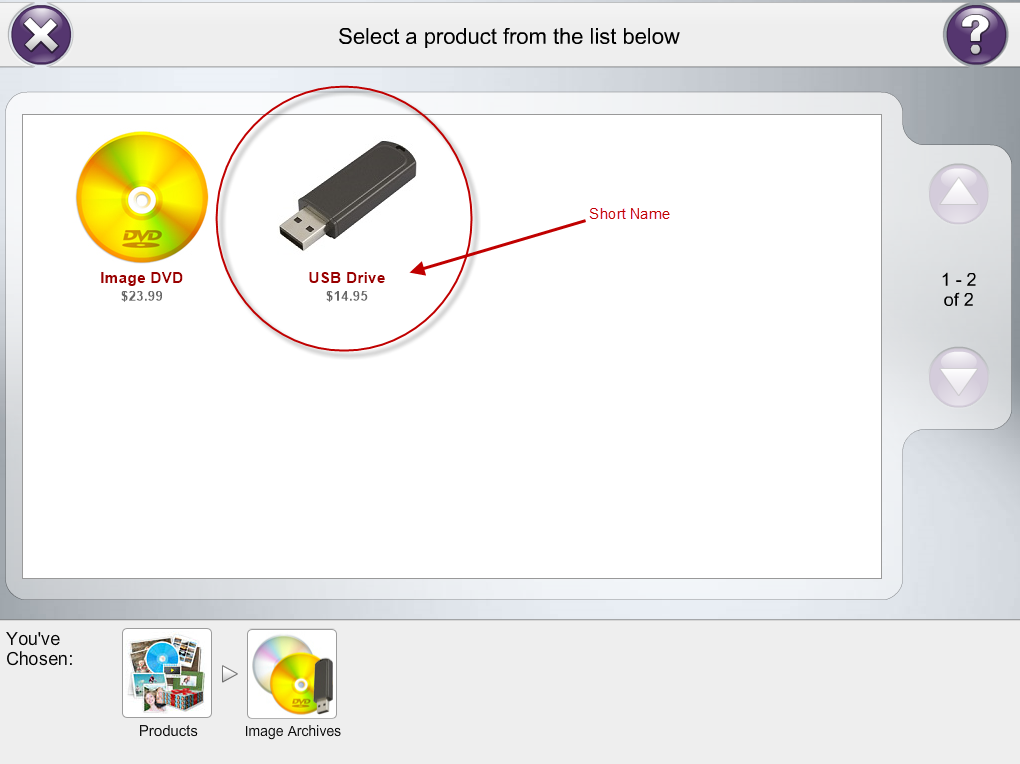
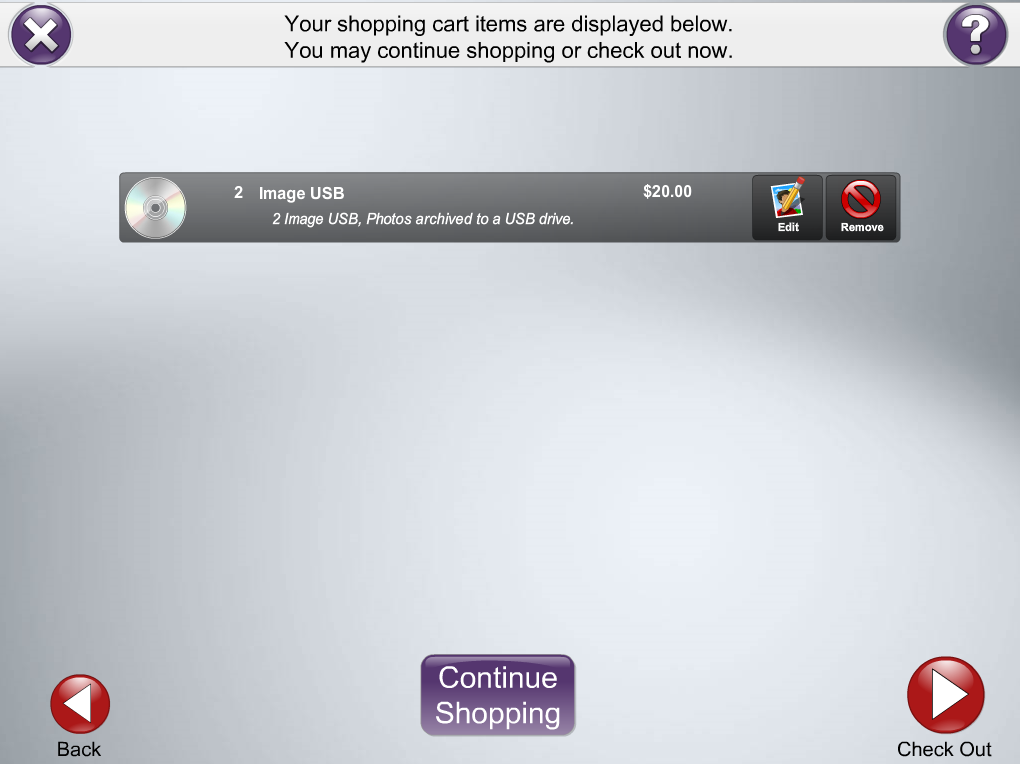
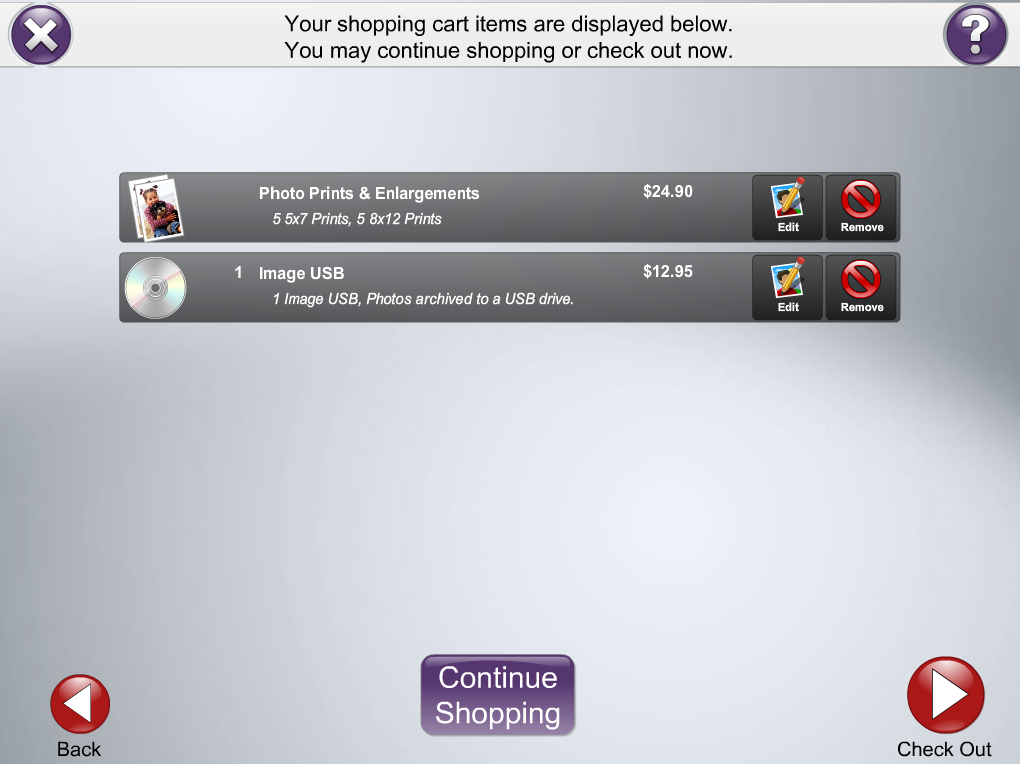
The USB, DVD and CD are all what we call Image Archives. The user can only pick one of these archive types per order... so she could not order both a DVD and a USB in the same order.
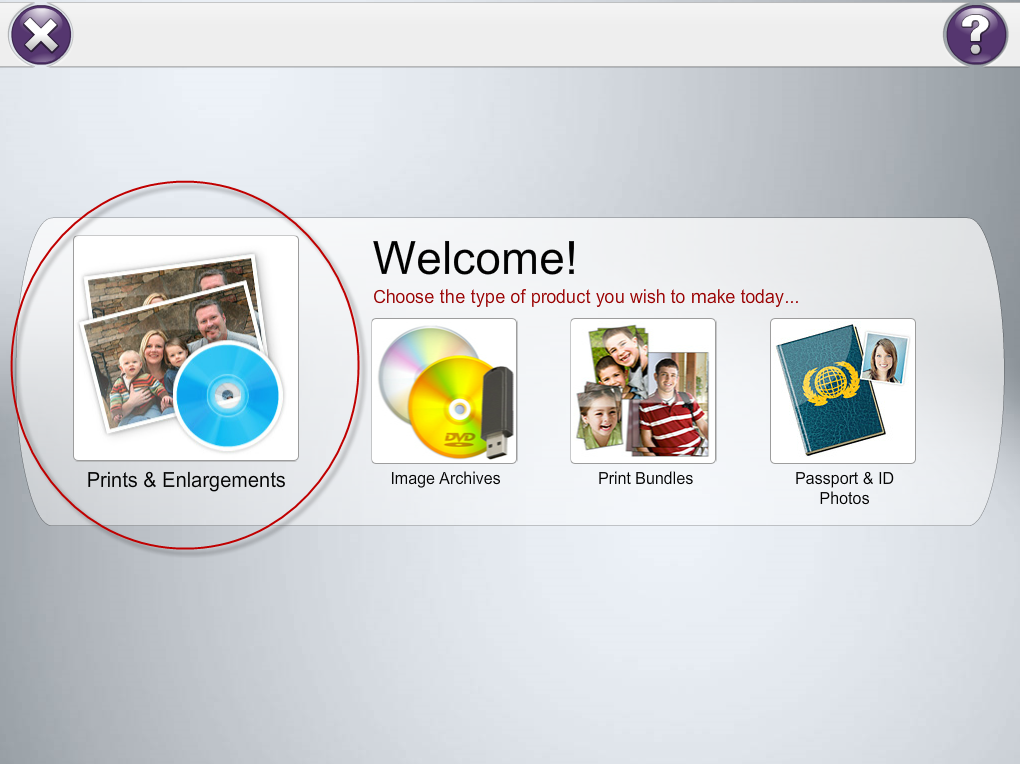
Offering the product on the kiosk
...
- in Setup Wizard
...
- , go
...
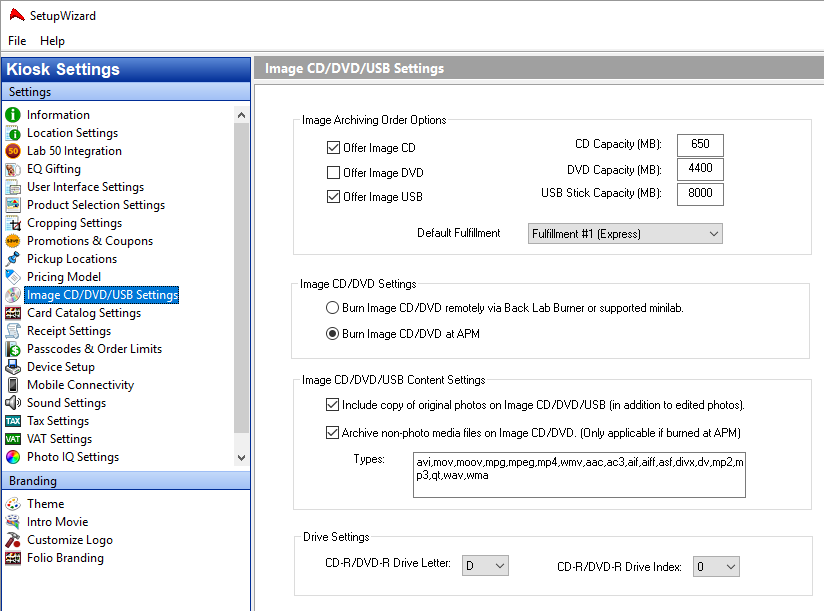
- to Kiosk Settings > Image CD/DVD/USB Settings
- Check off Offer Image USB and adjust the capacity settings
...
- and default fulfillment. The default fulfillment is what will be used when the product is selected from the main menu. The product can also be ordered as an order options add-on, after prints are ordered.
Notes:
- The USB will be created via Lab 50 or Print 50, kiosk creation is not available
...
...
- .
- There can only be one default fulfillment set for all archiving products.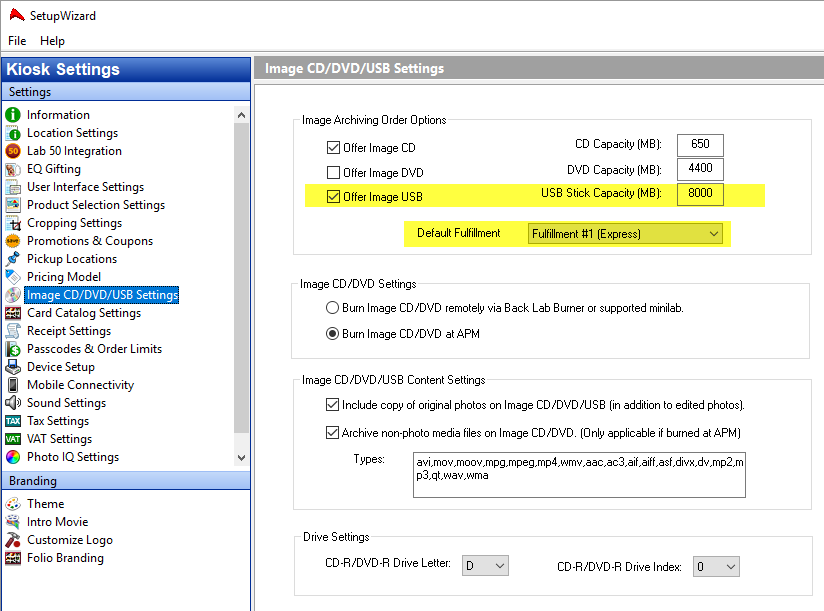
- Next, click on the Fulfillment
...
- you selected as default in the pulldown in the previous step. Click Main Options and under Order Option, check the box for Image CD/DVD/USB.
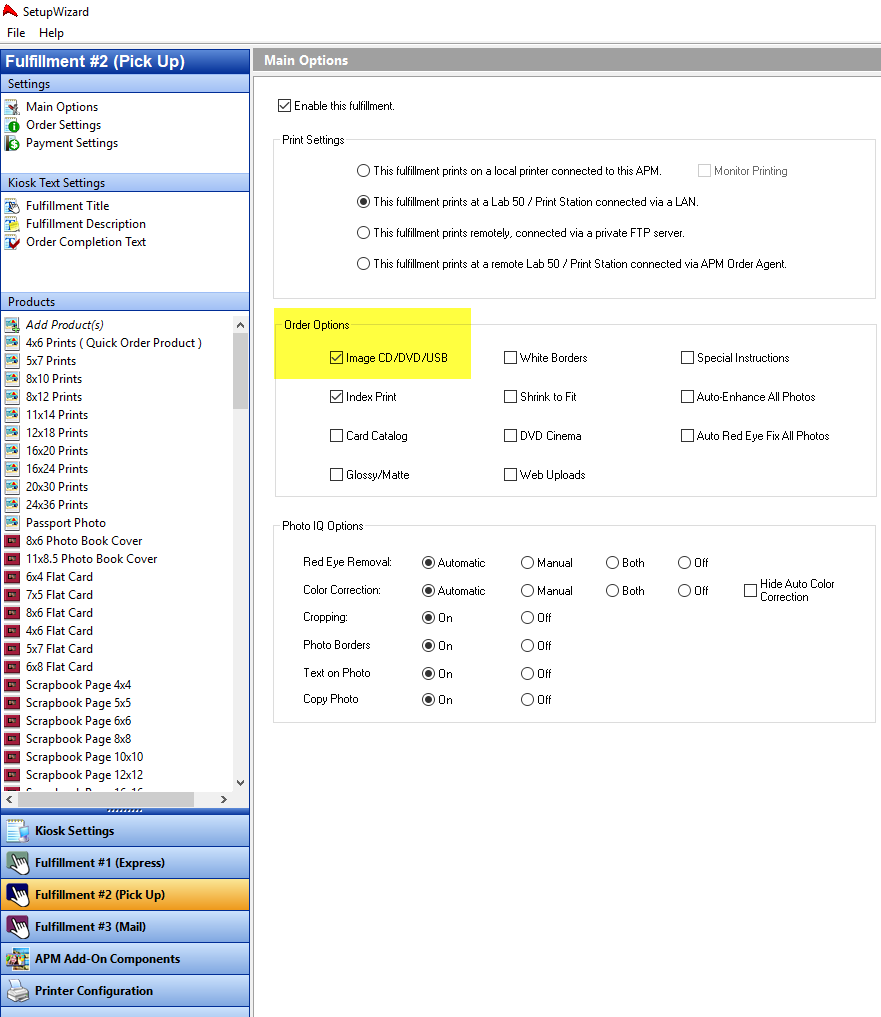
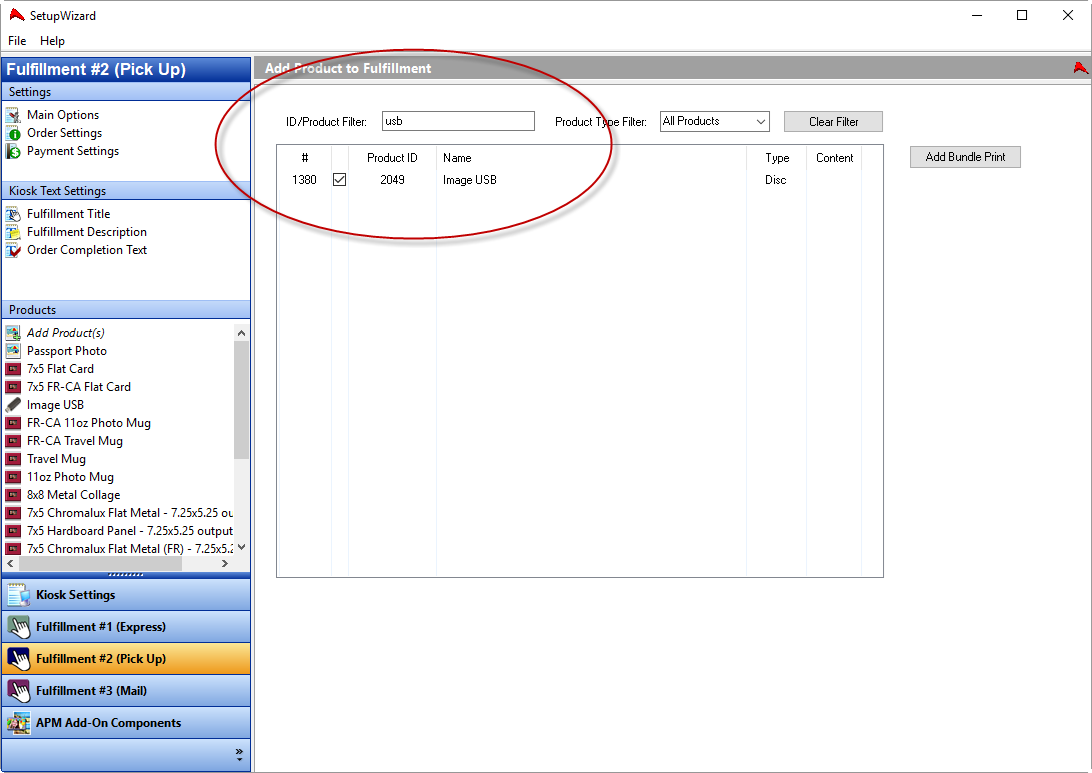
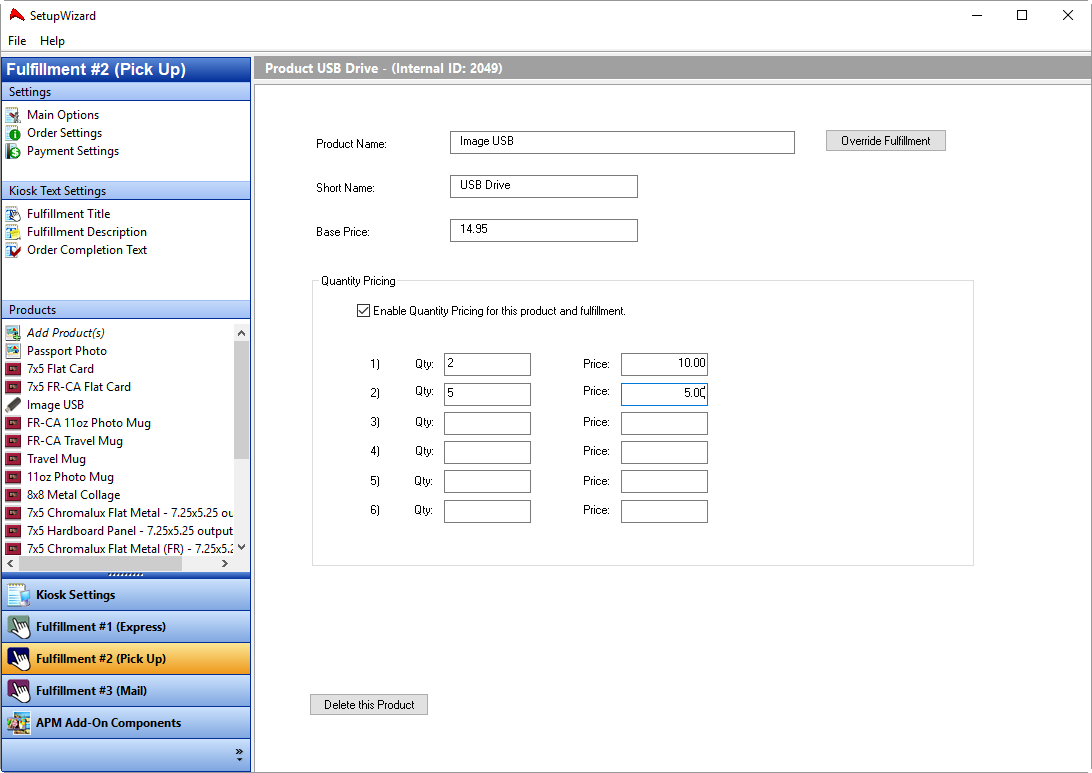
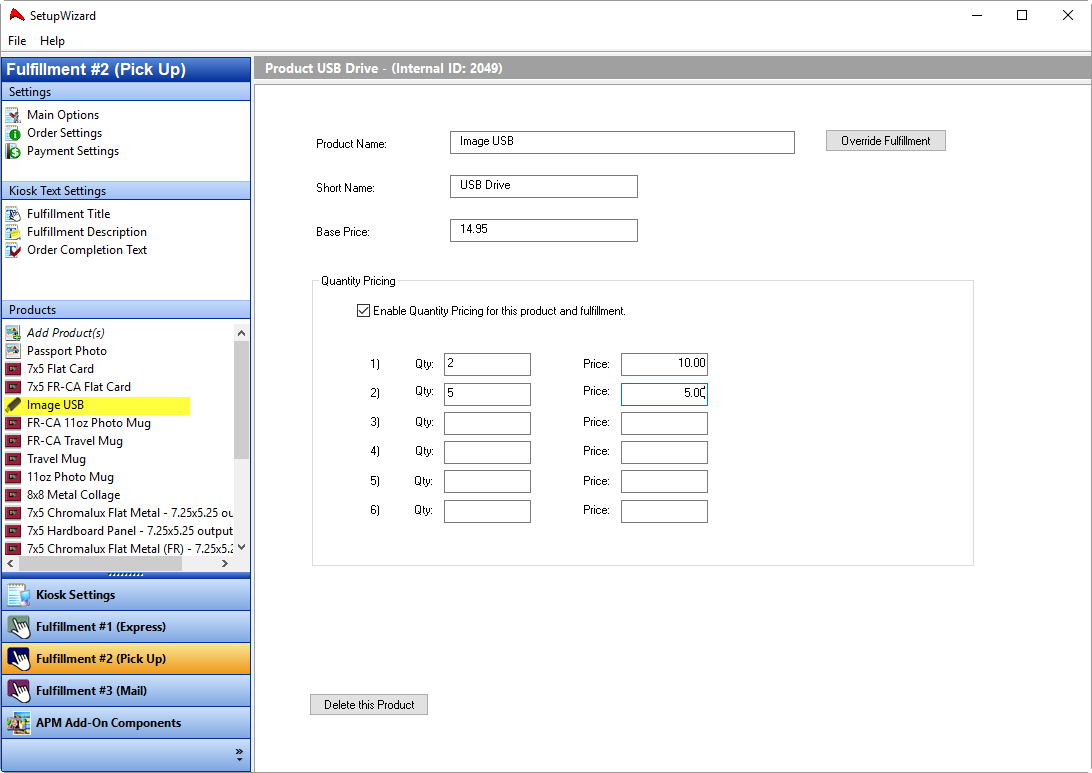
- The Image USB product should already be showing in the list (checking the box in Step 2 triggers this). Now, click on Image USB that now shows up in the Products list. Configure settings. Info about the settings:
...
-
- Product Name:
...
- shows in the shopping cart, order summary and receipt
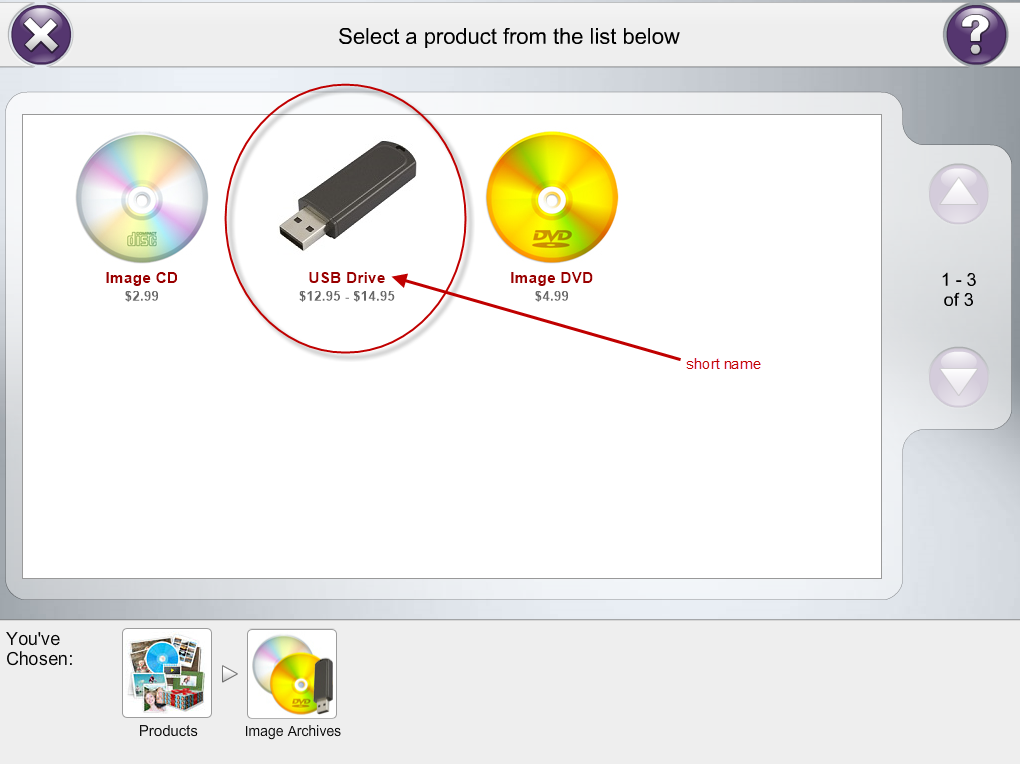
- Short Name:
...
- shows in the kiosk UI on the product selection
- Base Price:
...
- If you want just one price per drive, no matter the qty, enter only the base price and you are done.
- Quantity Prices:
...
- If you want to give a discounted price for customers ordering a certain qty, set that up using the qty system.
Example: base is $14.95, qty 2 is $10, qty 5 is $5. This means that if I order 1, it's $14.95. If I order 2, my total is $20. If I order 4 my total is $40. If I order 5 my total is $25.
- If you want to give a discounted price for customers ordering a certain qty, set that up using the qty system.
Kiosk experience
- Repeat Steps 3 and 4 for each fulfillment where you want to offer the product.
Kiosk experience
There are two ways the user can buy an Image USB.
Method 1: I know what i want!
I want to choose my images, and have you put them on a USB!
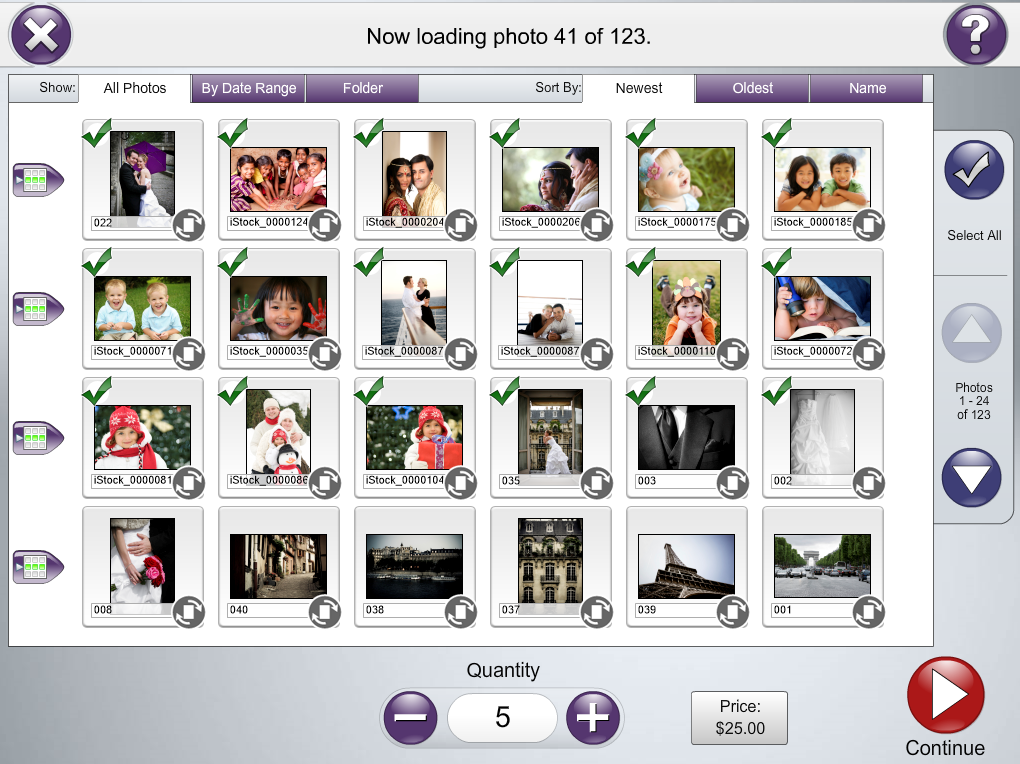
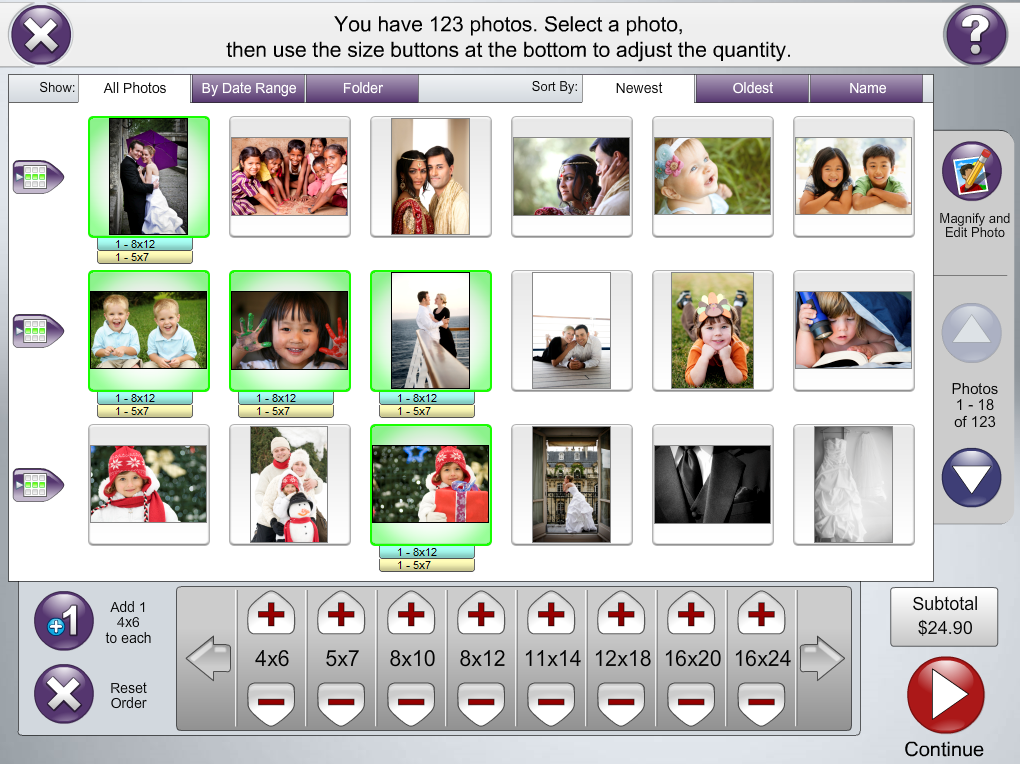
Here, the user selects the archive product group from the main menu, then picks USB Drive (this is where your short name comes in), then chooses the Select product group, select product, pick images to be included on the drive.
The prices here are whatever you set in the fulfillment you marked as default for the archive product (from Step 2 above). If you have quantity prices set, the Price box will keep up with the calculation as the user changes the quantity.
Method 2: I was upsold!
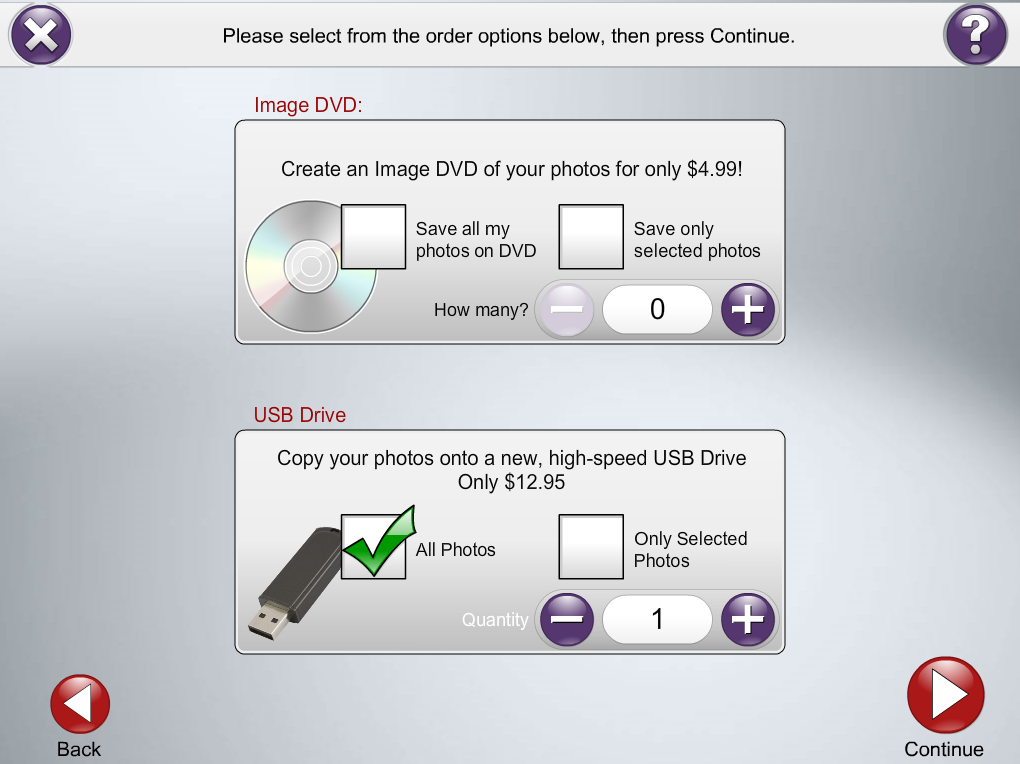
I put in my prints/creative order, but what's this I see being offered, an Image USB!?! Yes please!
Here, the user opted for Prints (or could have done a creative product too), and when that is done, was presented with the option to add an Image USB. If you have the Image USB set up for multiple enabled fulfillments, the pricing for whichever fulfillment the user picked will be used. With this option, the user can choose to include all the photos from his or her session, or can elect to use only the ones he or she has ordered.
Production of the Image USB
The Image USB is made through Lab 50 or Print 50. There is no option to create the USB at the kiosk, like you can do with discs.
TO create the Image USB:
- Setup: In Lab 50, set your output folder under Settings > Fulfillment > Media Output.

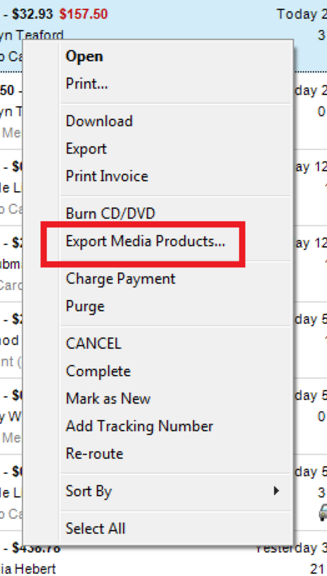
- Right-click the order and choose the new “Export Media Products” option instead of a typical Export.
- This will save the applicable photos to the folder you defined in step 1, where you can then copy them to the USB stick.
- Open that folder, open the drive where the USB is plugged in and copy over the images.
FAQ
- Do I need to use Lab 50 to create the USB?
- Yes. (Or Print 50).
- Are you going to ever have it like the DVDs, where you can "burn" it at the kiosk?
- This is not planned for the short term. Long term remains to be decided.
Does it matter what device was used when ordering the USB (phone versus a memory card)?
No.