To use the ColorFlow processing features in Lab 50, you'll first need to enable it within the Photo Processing screen.
| Advanced Tables - Table Plus |
|---|
| columnAttributes | style="text-align:center;" |
|---|
| align | right |
|---|
|
| Photo Processing > ColorFlow |
|
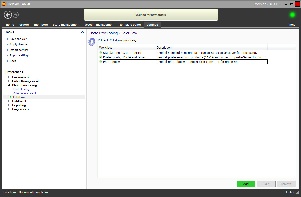
- At the top of the Menu bar, select Settings.
- On the left panel select Photo Processing > ColorFlow.
- Check the box Enable ColorFlow processing.
- Click on the Add button at the bottom of the right panel to begin the setup of a new Workflow.
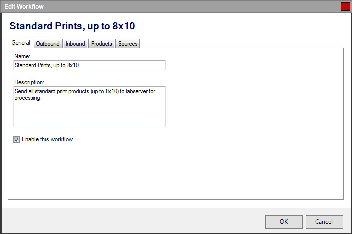
Configuring a new Workflow for editing Photos
| Advanced Tables - Table Plus |
|---|
| columnAttributes | style="text-align:center;" |
|---|
| align | center |
|---|
|
| Adding/Editing a ColorFlow Workflow |
|
| Advanced Tables - Table Plus |
|---|
| columnAttributes | style="text-align:center;" |
|---|
| align | center |
|---|
|
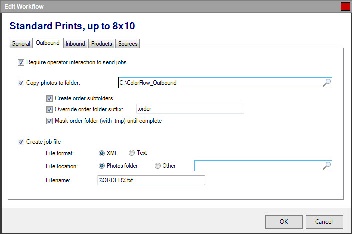
| Configuring Output Settings and Locations for Photos |
|
| Advanced Tables - Table Plus |
|---|
| columnAttributes | style="text-align:center;" |
|---|
| align | center |
|---|
|
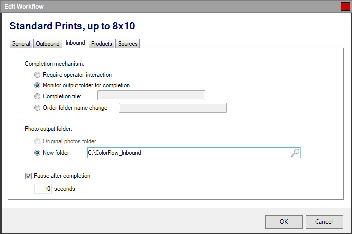
| Configuring Lab 50 Monitoring for Completed Photos |
|
| Advanced Tables - Table Plus |
|---|
| columnAttributes | style="text-align:center;" |
|---|
| align | center |
|---|
|
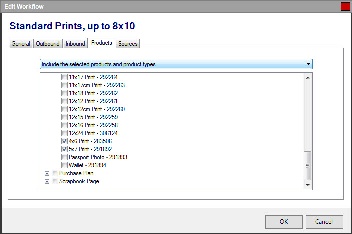
| Specifying Products assigned to a Workflow |
|
| Advanced Tables - Table Plus |
|---|
| columnAttributes | style="text-align:center;" |
|---|
| align | center |
|---|
|
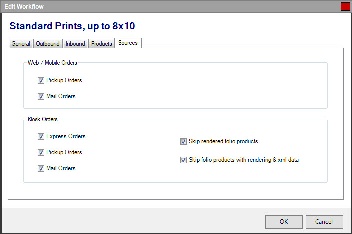
| Configuring Order Types within a Workflow |
|
| Advanced Tables - Table Plus |
|---|
| columnAttributes | style="text-align:center;" |
|---|
| align | right |
|---|
|
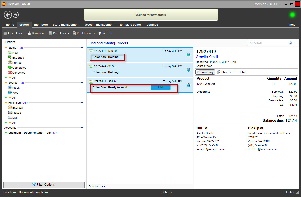
| Orders Queued for ColorFlow Processing | 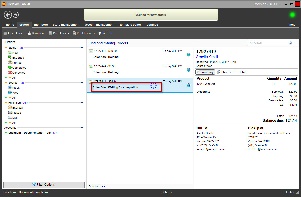
| Lab 50 Monitoring for Photo Editing Completion | 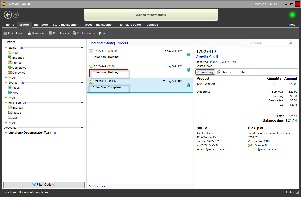
| Order Editing Completed and Next Order Queued |
|
There are six order status values that may be displayed on the Orders screen while processing orders through ColorFlow. All ColorFlow status updates are prefaced with Color flow: and appear directly under the order number for any given order.
The order status indicators include the following:
- Holding: The holding status appears when ColorFlow has been configured to only process one order at a time. Options that will require single-order processing include the following:
- The option to "Copy photos to folder" is disabled under the Outbound tab.
- The option to "Create Order Subfolder" is disabled under the Outbound tab, and the option to "Copy Photos to Folder" does not include an %ORDER% macro.
- The "New Folder" option is enabled under Inbound tab > "Photo Output Folder", but the "New Folder" path does not include an %ORDER% macro.
- Ready to Send: This status is displayed if the "Require operator interaction to send" option is enabled. To start the ColorFlow Workflow, the lab operator will need to manually click the SEND button.
- Preparing: This notification is displayed while Lab 50 is copying photos and any necessary order files to the editing folder for processing.
- Waiting for Completion: This option is displayed on-screen while Lab 50 monitors for processing completion. If the Workflow is configured to "Require operator interaction to complete", a DONE button will be displayed until the operator clicks on it manually. If the WorkFlow is configured to monitor the inbound folder, folder name, or for a file complete indicator, a spinning icon will be displayed until the required completion status is reached through file count, folder renaming, or file creation.
- Processing Output: This notification is displayed while Lab 50 is copying edited files back into the database for rendering the final product(s).
- Complete: ColorFlow processing is complete, and the order will be sent to print after a slight pause to allow for the software cache to update.