In this section we will cover the order fulfillment options in detail. These settings are accessed via Settings > Fulfillment, and they include the following:
- General
- Print Server
- EQ Gifting
- Output Folder
- Disk Maker
- Back Lab Burner
- Adobe PDF
- ADRS
General Printer Settings

The options configured via the General tab control the steps taken by Lab 50 upon receipt of an order.
- Access Settings > Fulfillment > General.
- On the right panel, the following options are available:
- Rotate images automatically: Check the box to automatically rotate images to the correct orientation. _This only applies when the Output Folder option is used.*
- Apply borders to images: Check the box to render the borders with the photo. _This only applies when the Output Folder option is used.*
- Output order files: Check the box to export an order.xml file with the order. The folder location specifies where you want the order files to be stored. By default, the folder path is the Export folder within the main Lab 50 installation directory. This only applies when the Output Folder option is used. **
- Mask payment details: If you choose to output the order file, you have the option to encrypt the credit card information contained in the order file for security purposes.
Payment info
**Note: As of December 2009, payment information is no longer viewable within Lab 50 for PCI compliance.
- Process orders automatically after download: Check the box to allow all orders to be processed automatically after they are downloaded. **
- Do not process orders with over X copies: If the process all orders automatically after download option is enabled, you can choose to not process the order if the orders contain more than X prints. X represents the number of prints.**
- Do not process orders valued more than $X: If the process all orders automatically after download option is enabled, you can choose to not process the order if the orders total more than $X. X represents the total dollar amount.
- Rendering DPI: Render the images using the specified DPI.
- After making the necessary changes, press Apply Changes or Save and exit.
|
The options configured via the General tab control the steps taken by Lab 50 upon receipt of an order.
|
Printing Via Print Server
The Print Server is the backend application to convert orders into the format used for one or more different interfaces for printing. It supports many common minilab printer interfaces, such as Noritsu DPOF, and Fuji PIC, and can help automate your workflow for a quick turnaround.
- Access Settings > Fulfillment > General.
- On the right panel, the following options are available:
- Print Server hotfolder: The folder path where Print Server picks up the orders for processing. The default setting is C:\APM_TRANSFER\orders\local, and this path normally should not be changed.
- Start the Print Server automatically: Check the box to start the Print Server automatically when an order is sent to print.
- Fit photos to paper: Check the box to shrink photos to fit to the paper option (images shot at 4x5.33 printed on 4x6 will exhibit white borders on two sides as the image is "fit-in" to the print size).
- APM Setup Wizard: Click on the APM Setup Wizard button to open the Setup Wizard application. This is used to access, configure, and setup your printer interfaces to your minilabs, dye sublimination printers, hotfolders, etc.
Printer Interfaces for Print Server
**Note: For additional information on configuring the Setup Wizard for your particular printer interface, please see the Printer Interface Guide
Printing Via EQ Gifting
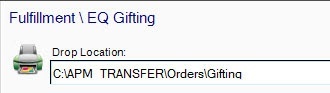
The option to process orders in EQ Gifting mode is intended for use on order types containing products that are produced in-house such as photo mugs, puzzles or t-shirts. When products are specified for this type of fulfillment, they will be output to the specified location along with an order information file.
- Access Settings > Fulfillment > EQ Gifting.
- On the right panel, you can adjust the following:
Drop location: The folder path to use for printing EQ Gifting orders.To process orders using this fulfillment type, simply select to Print the order as you would for any standard print order.
|
The option to process orders in EQ Gifting mode is intended for use on order types containing products that are produced in-house such as photo mugs, puzzles or t-shirts. When products are specified for this type of fulfillment, they will be output to the specified location along with an order information file.
|
Printing Via Output Folder (Web Orders Only)

The Output Folder works similarly to the HotFolder Printer Interface used by the Print Server, with the exception that orders are processed directly through Lab 50.
- Access Settings > Fulfillment > Output Folder.
- On the right panel, the following options are available:#
- Output orders to this location: The folder path to use as the destination folder for the orders. This may be a local folder on the same hard drive as the installation of Lab 50, a secondary drive, or a network drive.
Note: If a network drive is used as the destination path, ensure there is adequate disk space and the correct permissions are set for Lab 50 to write and modify the images from the order.
Output orders automatically: Check the box to process the orders automatically once they are received.
Note: Only products that are assigned to print via the Output Folder will be processed automatically.
Output photos: Check the box to enable the Output Folder option. Next, you can specify the folder naming scheme that will be used to place image files into subfolders using the following settings:
Apply templates: By checking this option, the template is automatically rendered with the photo if it is a template based product.
Format image filenames: Use the supported macros listed below to format the image filenames.
- %ORDER% - uses for the order number as part of the file name
- %ITEM% - Used for the item number and as a unique identifier (and a required macro to prevent the system from overwriting file names).
- %QTY% - indicates the QTY ordered for a given image for a given product
- %PRODUCT% - includes the Product Name output file name
- %FINISH% - includes the Product finish in the output name
- %BORDER% - Adds the paper border type to the file name
- %FILENAME% - Adds the original file name the new file name
- To add a macro to the Filename format string, simply double click on the macro that you want to insert. An example of the formatted filename string is displayed when you insert or remove a macro.
The %ITEM% Macro
When setting up a template macro, the %ITEM% macro must be present in the template to avoid instances where the different images overwrite each other because they output with the same file name.
- Use subfolders: This creates a separate folder for each order.
- Use the supported macros list below to format the subfolder name. Double-click to insert and display within the subfolder name format.
- %ORDER% - uses for the order number as part of the file name
- %TYPE% - Used for the order type.
- %PRODUCT% - includes the Product Name output folder name
- %FINISH% - includes the Product finish in the folder name
- %BORDER% - Adds the paper border type to the folder name
- %QTY% - indicates the QTY ordered for a given image for a given product
- %LASTNAME% - Adds the customer last name to the folder name
- After making the necessary changes, press Apply Changes or Save and exit.
|
The Output Folder works similarly to the HotFolder Printer Interface used by the Print Server, with the exception that orders are processed directly through Lab 50.
|
Disk Maker and Back Lab Burner
Disk Maker is the legacy built-in burning tool used to create Image CDs. Back Lab Burner is an upgraded version of the Disk Maker which can burn both Image CDs and DVD Cinemas as ordered at the kiosk. Completing a DVD order at Lab 50 frees up the kiosk allowing the next customer to place their order.
Back Lab Burner
Note: Back Lab Burner requires installation of the Back Lab Burner software on the same machine as Lab 50.
Configuring Disk Maker:

- Access Settings > Fulfillment > Disk Maker.
- On the right panel, the following options are available:
- Include the contents of this directory when creating a disk: By default, the Photo Finale desktop viewing software is included on the Image CD. You can designate another application or add any other additional content to an Image CD order by either changing the content in theC:\APM_FOLDERS\PhotoFinale folder or modifying the folder path to that of the alternate data you wish to include on the disc.
- After making the necessary changes, press Apply Changes or Save and exit.
Configuring Back Lab Burner:

- Access Settings > Fulfillment > Back Lab Burner.
- On the right panel, the following options are available:
- Enable Back Lab Burner: Check this box to enable Back Lab Burner.
- Temporary Drop Location: The temporary folder used during the burning process. (Normally left as default)
- Products for Back Lab Burner fulfillment: Lists all products that Back Lab Burner can fulfill. Items will need to be checked off to process properly. If a media type is not displayed in the list, you will first need to enable it in the Product Catalog > All Products > Media Products section of Store Management.
- Drive: If you have multiple CD/DVD drives installed, select the drive that you would like to use to burn the Image CDs and DVDs.
- Default DVD Cinema Options: These options are used for DVD Cinema products offered online. (Normally left as default)
- Title: Title that is displayed at the beginning of the DVD Slideshow. (Normally left as default)
- Menu Theme: Background theme displayed on the Menu screen. (Normally left as default)
- Music: Background music played throughout the slideshow. (Normally left as default)
- Style: Transition style to be used between each photo display. (Normally left as default)
- Frame: Decorative frame that appears on-screen around the photos.(Normally left as default)
- After making the necessary changes, press Apply Changes or Save and exit.
Disk Maker is the legacy built-in burning tool used to create Image CDs. Back Lab Burner is an upgraded version of the Disk Maker which can burn both Image CDs and DVD Cinemas as ordered at the kiosk. Completing a DVD order at Lab 50 frees up the kiosk allowing the next customer to place their order.
Back Lab Burner
Note: Back Lab Burner requires installation of the Back Lab Burner software on the same machine as Lab 50.
Configuring Disk Maker:
|
|
Configuring Back Lab Burner:
|
|
Printing Via Adobe PDF Interface

Certain products, such as photo books and posters, offer the option to process the order in either JPEG or PDF format. If you opt to print using PDF format, there are two supported PDF Interfaces within the Lab 50 software. One option is to print via the Lab 50 Adobe PDF Interface, and the other is via Print Server.
In this section, we will only go over the configuration settings for the Lab 50 Adobe PDF Interface. Although this option is available for processing, we recommend using the PDF interface for the EQ-9800/9850 or the Hot Folder interface via the Print Server for maximum automation and customization. For instructions on how to set up the PDF Printer Interface via Setup Wizard, please see the printer interface guides.
Configuring the Adobe PDF Interface:
- Access Settings > Fulfillment > Adobe PDF
- On the right panel, you can adjust the following:
- Order drop location: The folder path to use for exporting PDF format orders.
- Bleed: Adds fractions of an inch to the output to allow for overbleed settings on the printer. The default value is 0.125 and typically is not modified.
- After making the necessary changes, press Apply Changes or Save and exit.
|
Certain products, such as photo books and posters, offer the option to process the order in either JPEG or PDF format. If you opt to print using PDF format, there are two supported PDF Interfaces within the Lab 50 software. One option is to print via the Lab 50 Adobe PDF Interface, and the other is via Print Server.
|
ADRS
ADRS is a legacy option not generally used in Lab 50. The settings should be left as-is with the default settings.

ADRS is a legacy option not generally used in Lab 50. The settings should be left as-is with the default settings.
|