The Konica DPOF interface allows the APM or Lab 50 software to convert orders generated from an APM into an order structure that the Konica QD-21 and Konica R1/R2 can recognize and print.
Prerequisites
- The APM and/or Lab 50 machine needs to be able to see the Konica machine across the local area network and vice versa.
- On the Konica machine, the necessary print channels need to be setup prior to the APM/Lab 50 setup.
- The QDIF folder on the APM/Lab 50 machine needs to be shared out so that the Konica can see it from across the network.
- The Konica printer must be configured to look to the shared folder for incoming orders.
- If there are Glossy and Matte options available at the kiosk, then it is best to make sure that two different Konica DPOF interfaces are setup and configured, so that one handles Glossy and one handles Matte. These two interfaces should also be setup to output to different folders.
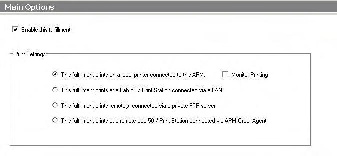
- If Lab 50 is not present in the local installation, then at least one or more fulfillments must be enabled to print to a local printer connected to the APM. This is seen in the screenshot below, taken from the main options of an enabled fulfillment in the Setup Wizard.
Print Settings
Setting up the Konica DPOF Using the Setup Wizard
The Setup Wizard is used to configure the APM to print to Konica DPOF Interface.
This process includes the following steps:
- Adding the printer interface and editing the general settings.
- Product setup from within the interface.
- Assigning printable products to the interface.