Sending orders straight from the kiosk (Print Server):
- Press the bottom left corner of the intro screen.
- Enter the pass code (default is 1234).
- Select the Setup Wizard.
Using Lab 50 installed on a separate computer:
- Click on the Settings tab in Lab 50.
- Select the Fulfillment option on the left side of the screen to expand it.
- Select Print Server.
- Press the Setup Wizard button, and the Setup Wizard will launch.
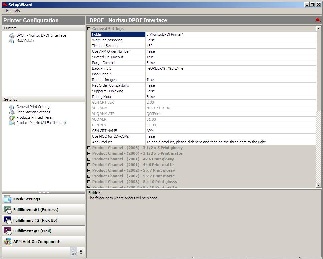
Once you have the Setup Wizard open:
- Click on Printer Configuration.
- Click on Add Printer.
- In the menu at the right, select Noritsu DPOF.
- In the Printer Name field, enter “DPOF”, or any name you wish to use.
- Click the Add button.
- Click on the newly created Noritsu DPOF Interface option in the top, left corner to display the options for this interface.
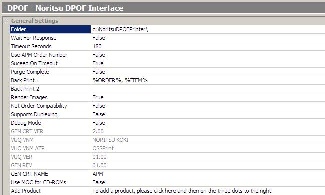
Noritsu DPOF General Settings:
Folder: Enter the UNC path to the desired folder location where it stores all the incoming orders for Noritsu to pick up. (Default is C:\NoritsuDPOFPrinter. Other examples that would work would be \\Labserver\APMIncoming, D:\APMOrders, etc.)
Note on the DPOF Output Folder
If the folder location is on the network, please make sure that this folder is shared out and set to allow other users and computers (such as the QSS or EZ Controller) access to view and modify the files from across the network.
- Wait For Response: If set to True, the APM software will wait for a printed status from the Noritsu software to determine if the current order was successfully printed before sending a new order. (Default is False.)
- Timeout Seconds: Leave as default (which is 180 seconds) unless instructed to change for troubleshooting purposes.
- Use APM Order Number: When set to True, the order folders will then be renamed according to the last six numeric digits of the APM order number, as shown on the printed receipt. It is ideal to leave it as True, so orders will be organized in a logical way through the printing process.
- Succeed On Timeout: Marks the order as successful when a timeout occurs. Do no change unless instructed for troubleshooting purposes. Default is True.
- Purge Complete: With this option set to True, the orders that are successfully printed will be deleted from the folder location that is specified in the Folder field. If False, all the orders will be stored until manually get deleted. This setting also requires that Wait for Response is set to True. Default is False.
- Back Print 1 and Back Print 2: Used to specify the desired back print format using the case-sensitive parameters listed below. (Default is to print the APM order number and the item number, %ORDER%, %ITEM%)
The following is a list of available case-sensitive parameters that may be used:
- %ORDER% - Order Number
- %PRODUCT% - Product Name
- %PROD_ID% - Product Id
- %FINISH% - Finish option (glossy/matte)
- %QTY% - Quantity
- %ORIG_FN% - Original File Name
- %ITEM% - Item Index
- %YEAR% - Current 4 digit year
- %MONTH% - Current 2 digit month
- %DAY% - Current 2 digit day
- %FNAME% - Customer first name
- %LNAME% - Customer last name
- %PHONE% - Customer phone number
- Render Images: This option will pre-render all images before they are sent to the printer, providing the correct aspect ratio and border settings. Recommended setting is True (Default is False).
- Net Order Compatibility: Set to True only if you want to send orders to the Noritsu printer in NetOrder mode.
**Note: This also assumes that NetOrder Mode is enabled on the minilab.
- Supports Duplexing: Enable this setting if your Noritsu printer supports duplexing. This feature is only available in DPOF version 1.7 of greater, and the printer hardware must support this functionality.
- Debug Mode: If after changing all the settings the Noritsu DPOF interface does not work, come back into this screen and set this to True. (Default is False.)
- GEN CRT VER, VUQ VNM, VUQ VNM ATR, VUQ VER, and GEN REV: These fields should be left to their default setting.
- GEN CRT NAME: This field is set to APM as default. This does not need to be changed.
- Use MOC for CD-ROMS: Used to send Image CD orders to the Noritsu for processing the order. This is used with Noritsu software version 6.