Lab 50 features a built-in editor for color correcting photos, cropping, and adjusting color density. Additionally, a lab operator can edit the photos and text on each page of a creative product.
Editing Photos
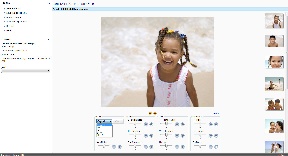
To access the internal editing features, simply click on an order from the Orders tab, click on the Photos option on the right panel, then double-click on a photo to open the editing screen. Once you’ve made your adjustments, click Save and Exit in the top left panel to return to the orders screen.
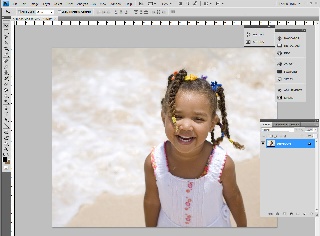
If you’d prefer to use a third-party application for editing, such as Photoshop, access the Settings tab > Preferences > Photo Processing > Photo Editing, and select the option to Use an external editor. Next, follow the steps as above to open the photo, and the photo will instead launch in the external editor.
Lab 50 Internal Image Editor Configuring External Editor Editing an Image in Photoshop

Editing Creative Products
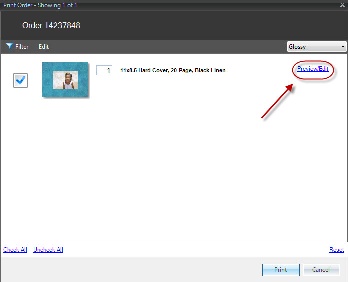
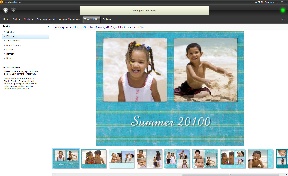
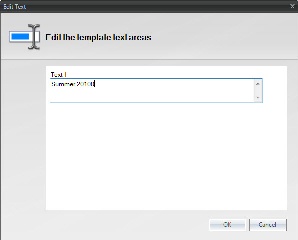
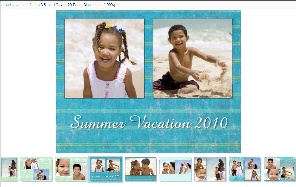
To make changes to text in a photo book, select to Print the order then on the print preview screen select the Preview/Edit option. Using the preview library on the bottom panel, select the page you would like to edit, then select Edit text... on the left panel. Change the text as necessary, then click OK. If you'd like to edit a photo on an individual page, use the directions given above for photo editing, and those changes will be applied within the photo book.
Note: When editing certain products such as a book or calendar product, it may take a few minutes to initially load the images for editing due to file size and speed/specs of the system.
Select Preview/Edit Option Text on Page Edit Text Screen Modified Text Preview