PFK v1.3 Build 48 introduced two new service modes (Express and Local), both designed to speed up local ordering/printing by keep images local and only transferring the order data to the cloud (myLab).
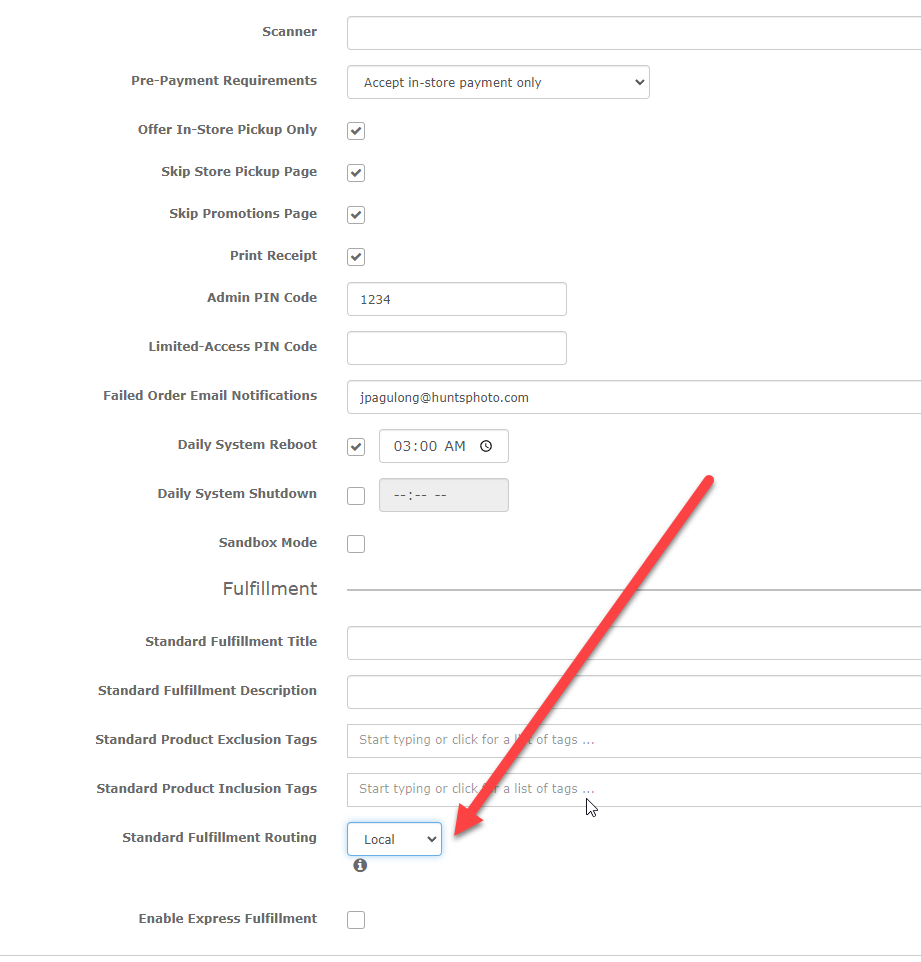
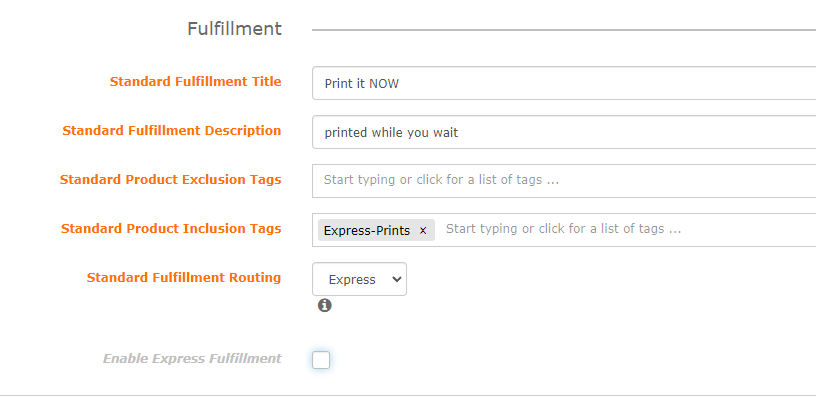
You will find these choices in myLab > Store Management > PF Kiosk > Settings

Note: if you want to exclude the products you use for express from your website/full-menu, just add those same tags to the "exclude" section of your "full menu" fulfillment setup.
1. On PF Kiosk computer: Attach printers/install drivers on your kiosk
2. On PF Kiosk: Open the Setup Wizard from C:\PF Kiosk\PrintServer* to configure
* When you first run the kiosk installer, there will be a question asking if you plan to use the kiosk with an Express choice. If you check the box, then the installer will copy in a new apmconfig_printstation.xml file (to c:\PF Kiosk\PrintServer\) which has the components needed for Setup Wizard to be able to configure an express printer. This should only be done once, otherwise on subsequent iterations they will be overwriting the express printer config that you have set up. There is no harm if you check it, then decide not to set it up.
1. In mylab (myLab > Store Mgmt > PF Kiosk): Choose "Local" from the pulldown. Allow 20-30min for changes to cache.

2. On the Kiosk: Quit the software using keyboard combo Ctrl + Shift + L.
3. In Print 50: share the local folder on the kiosk and add the import path in Print 50. Navigate to Settings > Order Management> Importing.
Note: Make sure the Print 50 has sufficient privileges to access the orders via the network.
This is the default, for existing setups there is nothing to adjust
Q: What does checking the Express option in the kiosk installer do?

A: When you first run the kiosk installer, there will be a question asking if you plan to use the kiosk with an Express choice. If you check the box, then the installer will copy in a new apmconfig_printstation.xml file (to c:\PF Kiosk\PrintServer\) which has the components needed for Setup Wizard to be able to configure an express printer. This should only be done once, otherwise on subsequent iterations they will be overwriting the express printer config that you have set up. There is no harm if you check it, then decide not to set it up.
Q: What if I am using Local printing, but have third-party filled-products?
A: Supplier-fulfilled products are automatically handled separately regardless of the routing mode.
Q: Can I have products on kiosk only, and not show up online? (example: Instant Prints)
A: If you have certain products that you want to be Express-only, go into myLab > Store Mgmt > General Settings and add the tag you want to not show on web to the Product Exclusion Filter there. That will exclude it from web and app orders.
Q: Can I only print receipts for express orders?
A: We do not yet have advanced invoice functionality (which would let you set up separate invoice rules for kiosk vs. web and express vs. pickup vs. mail). We plan to add this feature in the short term, however. ow, when an express order comes into Print 50 it will print an invoice if you have configured it to print invoices for all orders. Otherwise you can right-click on the order and print the invoice just for express orders.
Q: Can I use Lab 50 still?
A: Dealers that use Local Routing or Express Routing must switch to Print 50 for fulfillment. Dealers that continue to use Cloud Routing exclusively can stick with Lab 50 for now, but are encouraged to switch.
Q: Can I have an Express only kiosk?
A: Yes! In the Fulfillment section, you will just use the first "standard" setup, but choose Express at the bottom. Tag the products you want to show on that kiosk, and add them to the Inclusion list. The "Enable Express" selection is if you want to have a standard option as well as an Express (or other type will work too) as a second option, in which case the same directions apply, but just to the second set of fields that will show when you check the box.
