Sending orders straight from the kiosk (Print Server):
- Press the bottom, left corner of the intro screen.
- Enter the pass code (default is 1234).
- Select the Setup Wizard.
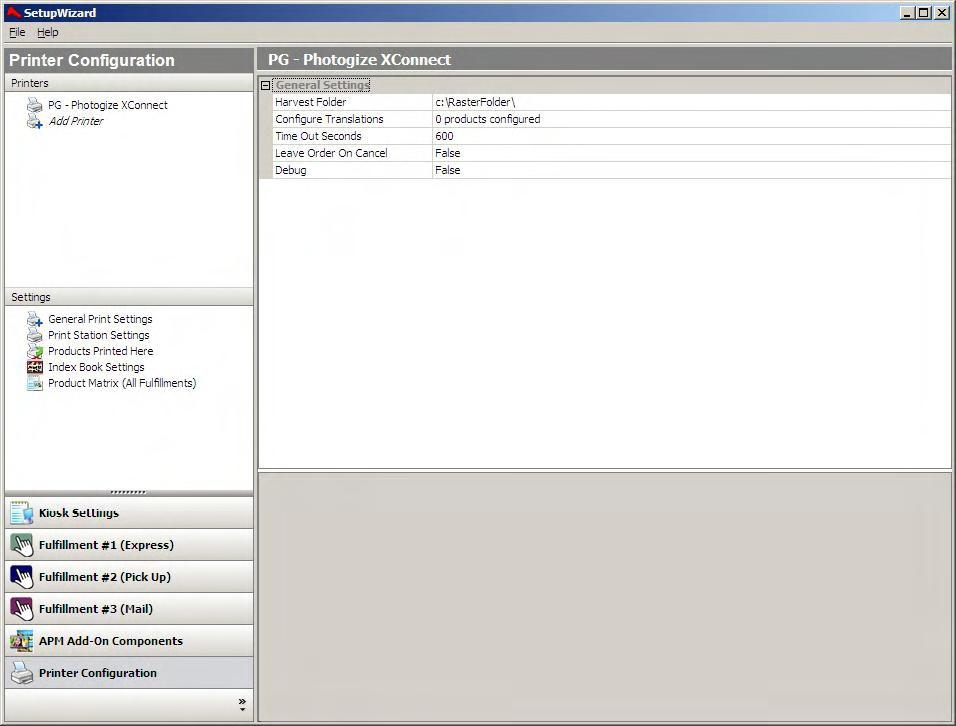
Setup Wizard Printer Configuration Screen
Using Lab 50 installed on a separate computer:
- Click on the Settings tab in Lab 50.
- Select the Fulfillment option on the left side of the screen to expand it.
- Select Print Server.
- Press the Setup Wizard button, and the Setup Wizard will launch.
Once you have the Setup Wizard open:
- Click on Printer Configuration.
- Click on Add Printer.
- In the menu at the right, select Photogize XConnect.
- In the name Printer Name field, enter “PG”, or any name you wish to use.
- Click the Add button.
- Click on the newly created Photogize XConnect Interface option in the top, left corner to display the options for this interface.
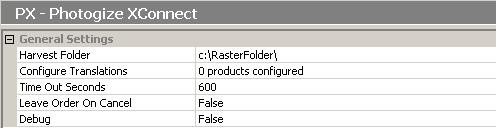
Photogize XConnect General Settings:
- Harvest Folder: This should be set to the same value as the Polling Folder path in the Photogize XConnect setup. (Default is _C:\RasterFolder_). If the folder is located on a separate machine on which Photogize is installed, the computer name needs to be included (e.g. \\ComputerName\RasterFolder ).
- Configure Translations: This is used to match product setup between Photogize and the APM. See the next section for detailed instructions.
- Timeout Seconds: Leave as default (which is 600 seconds) unless instructed to change for troubleshooting purposes.
- Leave Order On Cancel: Indicates whether or not to leave the order in the hot folder for printing later when a user cancels the job. The default value is False.
- Debug: If after changing all of the settings, the Photogize XConnect interface does not work, come back to this screen and set this to True. (The default value is False.)
Photogize Interface