...
Next, you will need to match the product up with a product that is currently configured for printing. To do this, go to Settings > Fulfillment > Print Server. On the right panel, click on the APM Setup Wizard. Once the Setup Wizard opens, click on the Product Matrix on the left panel. On the right panel, you'll now see a list of all of the configured kiosk products and their product codes. Make a note of the kiosk sizes and codes you want to assign to your online products to match them up for processing.
| Wiki Markup |
|---|
{| Advanced Tables - Table Plus |
|---|
: |
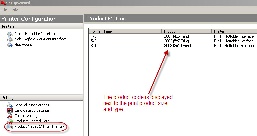 Image Added Image Added
|
|
Example: If you offer 4x6 prints online, you may want to match it up with a kiosk 4x6 print for processing.
...
Once you've located all the sizes and product codes you need, exit the Setup Wizard and access Store Management > Product Catalog and double-click on the product you'd like to edit. At the bottom of the General tab screen, there is a box to enter an optional ID number. Enter the number that corresponds with your configured kiosk products.
| Wiki Markup |
|---|
{| Advanced Tables - Table Plus |
|---|
: |
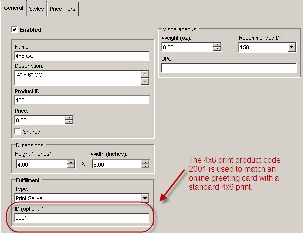 Image Added Image Added
|
|