We have a ton of print products in the library. If the name doesn't exactly match, you can edit it to what you need. It is the size that is the important part. If you do not find the size you need, then you can create your own custom print product. To do this...
Video tutorial:
| Widget Connector | ||||||
|---|---|---|---|---|---|---|
|
Another video:
| Widget Connector | ||||||
|---|---|---|---|---|---|---|
|
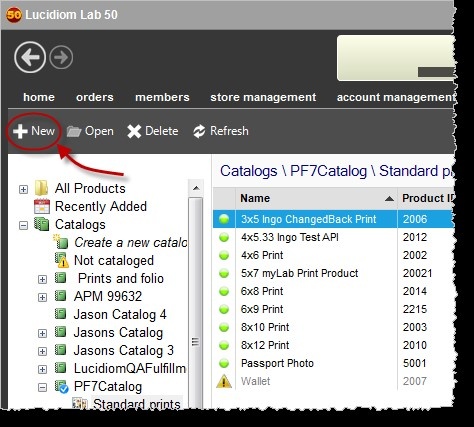
Directions in screenshot form:
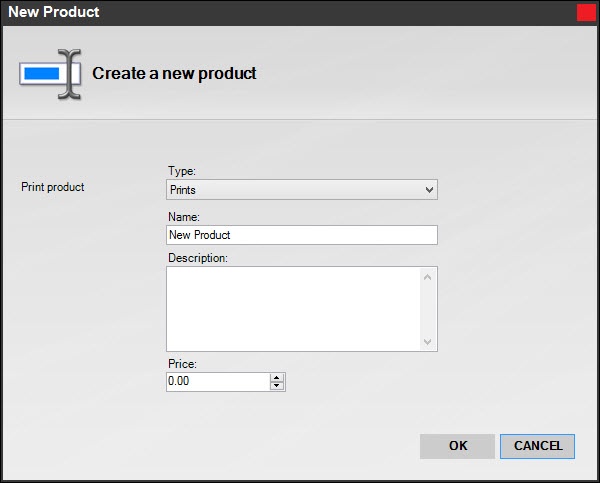
In Lab 50, go to To create a new product for online ordering, you will need to access Store Management > Product Catalog in your copy of Lab 50. On the left-panel, click . Click on the "New" button, and you will be promoted to select the type of product you would like to create and enter a name and price for the product. If you are creating a Membership Plan or Purchase Plan, the information entered in the Description box is the information that will be displayed on your website when the customer selects to purchase a Membership Plan or Purchase Plan.
| Wiki Markup |
|---|
{table-plus:align=center}
|!AddProduct.jpg|thumbnail,border=1!|
{table-plus} |
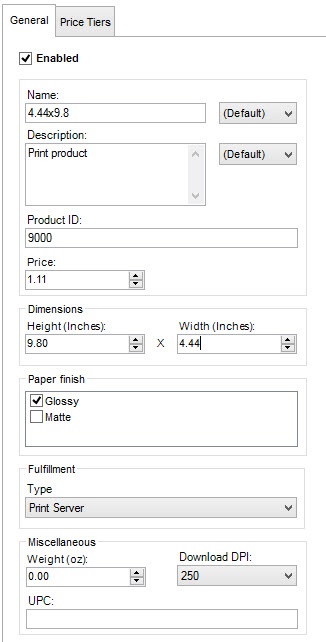
Once you have entered this information, click OK. The next screen will prompt you for additional information such as the product height/width, DPI, product weight (for calculating shipping, if applicable), and fulfillment type you'd like to use for processing orders. Please keep in mind that the fulfillment type you select may require additional configuration.
You may also specify whether or not a template should be applied to the product and which templates are available for the product using the Styles tab. Lastly, the Price Tiers tab allows you to specify multiple price points as the quantity of a particular product ordered increases. When you have completed the product setup, click on the Save Changes option on the left panel to complete setup.
.
Choose Prints and fill in the details.
For print products:
- Name/Description: Make sure you fill in a consistent name, and a good description (do not just copy the name). Descriptions are used in the Search feature, along with the product name.
- Product ID: Use a number in 9000-9999 range, which is the bracket we have reserved for client use. It is important that numbers are not duplicated.
- Enter price, dimensions of the output and paper finish if needed.
- Fulfillment for locally printed products should be set to Print Server
- Weight is used (optionally) for shipping
- The DPI value is not used, as we now send across the highest available image for printing.
- UPC is for your internal use.
...