...
| Advanced Tables - Table Plus |
|---|
| columnAttributes | style="text-align:center;" |
|---|
| align | center |
|---|
|
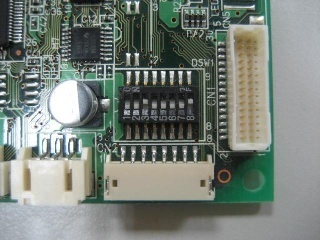
| Lever no.3 to "ON" position |
|
b) From the Windows Start Menu navigate to “Start>>Settings>>Printers and Faxes”. Once the Printers and Faxes windows opens right click on the printer titled “Receipt”. This name maybe different on you APM if the drivers have been re-installed. “Receipt” is however the default name for your receipt printer if unchanged from your receipt of the Kiosk. Select the properties menu item after right clicking on Windows Start Menu Item described above. Navigate to the “Ports” tab in the Receipt printer properties. Highlight the port the printer is attached and should be the default checked port (COM5|Serial Port). Once the port is highlighted click the configure port button.
...
| Advanced Tables - Table Plus |
|---|
| columnAttributes | style="text-align:center;" |
|---|
| align | center |
|---|
|
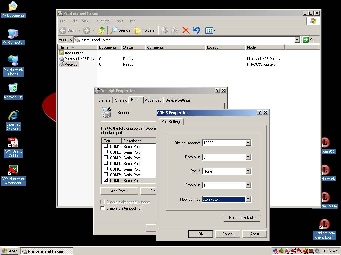
| Click on Flow control from NONE to XON/XOFF |
|
Reverse Steps 2 and 1 to install the Optical/Receipt bay tray and Front Bezel.
...